
Common 3D Printing Questions Answered
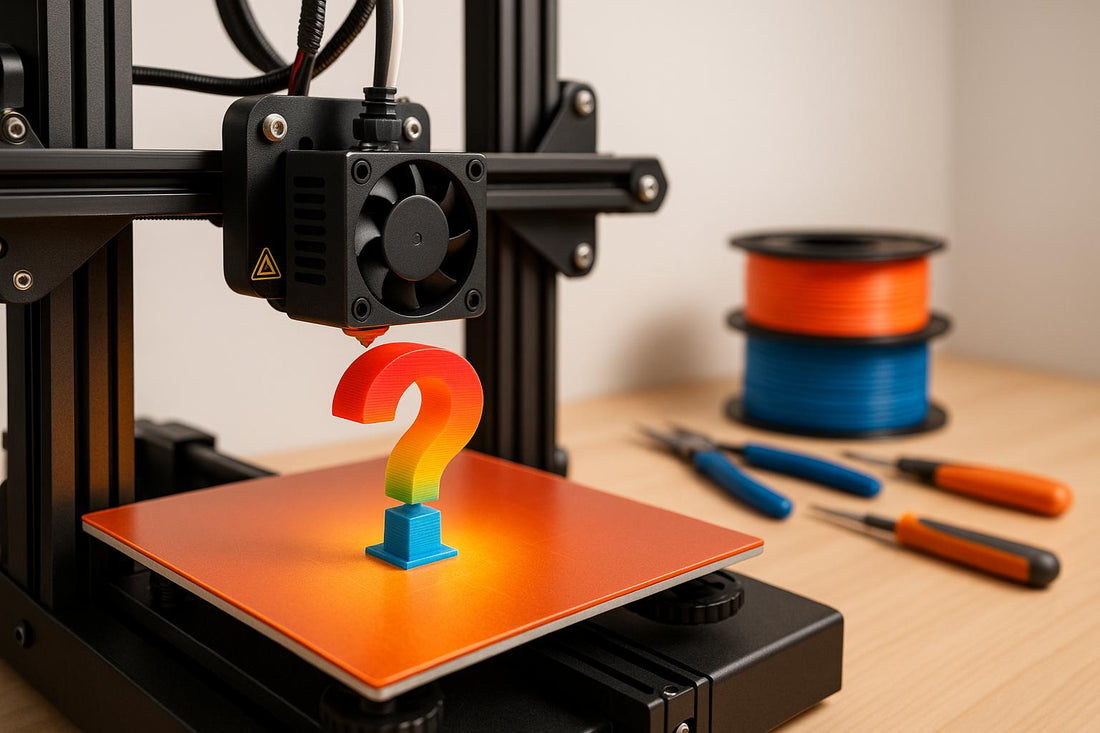
3D printing turns digital designs into physical objects by layering materials like plastic. It’s popular for creating custom items such as gaming accessories, household tools, and decorative pieces. Beginners often start with PLA filament for ease of use, while advanced users may explore tougher materials like ABS or PETG. To succeed, choose the right printer, maintain your equipment, and troubleshoot common issues like poor adhesion or warping.
Key Takeaways:
- Printers: Beginner-friendly options include the Ender 3 V2 ($250–$280) and Prusa MINI+ ($430).
- Materials: PLA is beginner-friendly, PETG offers durability, and ABS works for heat-resistant items.
- Troubleshooting: Fix issues like stringing or under-extrusion by adjusting settings and maintaining your printer.
- Custom Products: Companies like 3rd Prints offer personalized 3D-printed items, from keychains to dice towers, priced $16.99–$39.99.
Whether you're a hobbyist or tackling practical projects, 3D printing offers endless possibilities. Start small, learn the basics, and experiment with designs to improve your skills.
How to Choose the Right 3D Printer
What to Consider Before Buying
When picking a 3D printer, start by looking at the build volume. For beginners, most entry-level machines offer a print area around 8.7" x 8.7" x 9.8" (220mm x 220mm x 250mm). This size works well for smaller items like gaming dice, phone accessories, or decorative objects. However, if you’re planning to print larger pieces, such as tabletop game terrain or household items, you’ll need a bigger build space - something like 11.8" x 11.8" x 15.7" (300mm x 300mm x 400mm).
The type of printer you choose will shape what you can create. FDM (Fused Deposition Modeling) printers use heated plastic filament, making them versatile for many projects. Resin printers, on the other hand, use liquid photopolymer and UV light to produce highly detailed items, like miniatures or jewelry. Keep in mind, though, resin printers require more safety precautions and extra work after printing.
Don’t forget to account for material costs alongside the upfront price. Entry-level FDM printers typically cost between $200 and $300, while resin printers start around $150 to $250.
Ease of use is another key factor. Some models require manual bed leveling before every print, which can be tedious, while others offer automatic leveling to save time. Pre-assembled printers are also an option. They cost $50–$100 more but can save you 4–6 hours of setup time.
Once you’ve considered these factors, you’ll be ready to explore beginner-friendly printer models.
Top Printers for Beginners
Here are some of the best beginner options based on the features above:
- Ender 3 V2: Priced at $250–$280, this printer offers an 8.7" x 8.7" x 9.8" build area and manual bed leveling. While leveling takes practice, it’s a skill that pays off. Plus, the Ender 3 V2 has a large online community, so finding tutorials and troubleshooting help is easy.
- Prusa MINI+: At around $430, this printer is great for those who want a more user-friendly experience. It includes automatic bed leveling, magnetic build plates, and reliable performance. Its 7.1" x 7.1" x 7.1" build area is slightly smaller but suitable for most hobby projects.
- Bambu Lab A1 mini: This $300 printer comes packed with features like automatic bed leveling, filament detection, and smartphone connectivity for remote monitoring. Its enclosed design helps maintain consistent temperatures, which is ideal for reducing print warping.
- ELEGOO Mars 3: If you’re interested in resin printing, this model costs $200–$230 and offers a 6.6" x 3.7" x 6.9" build area. It’s perfect for miniatures and other detailed projects. The monochrome LCD screen speeds up printing and lasts longer, keeping maintenance costs down.
Features for Custom Projects
For more advanced or custom projects, certain features can make a big difference.
- Layer resolution affects how smooth your prints look. FDM printers typically handle layer heights between 0.1mm and 0.3mm. For functional items like phone cases, 0.2mm layers are a good balance of strength and speed. For detailed miniatures, 0.1mm layers are better but take longer. Resin printers go even finer, with standard layers at 0.05mm and some models reaching as low as 0.01mm for ultra-detailed results.
-
Material compatibility opens up creative options. Basic printers work well with PLA, but for custom projects, you might need specialized materials:
- Flexible filaments (like TPU) are great for phone cases, gaskets, or toys.
- Wood-filled filaments can be sanded and stained, making them ideal for decorative items.
- Glow-in-the-dark filaments add a playful touch to gaming accessories or toys.
- All-metal hotends allow for higher temperatures (up to 572°F or 300°C), enabling the use of advanced materials like carbon fiber composites and metal-filled filaments. Standard hotends, lined with PTFE, max out at 482°F (250°C) but are more affordable.
- Dual extruders let you print with two materials or colors at once. This is especially useful for creating water-soluble supports, multi-color designs, or combining rigid and flexible materials. Keep in mind, dual extruder printers are more expensive (an extra $200–$400) and require more calibration.
- Enclosures are essential for printing with ABS or other temperature-sensitive materials. They keep the printing environment stable, preventing warping and layer separation. Some printers include enclosures, while others sell them as add-ons for $100–$200.
Lastly, connectivity features like Wi-Fi printing and smartphone apps add convenience. These tools let you start prints remotely and monitor progress with built-in cameras. While they don’t directly improve print quality, they’re incredibly helpful for long or overnight prints.
3D Printing Materials Guide
PLA vs ABS vs PETG Comparison
The filament you choose plays a big role in the quality of your 3D prints. PLA, ABS, and PETG each have their own strengths and are suited for different applications.
PLA is a great choice for beginners. It prints at 200–210°C (390–410°F) and doesn’t require a heated bed. It produces minimal odor and has a tensile strength of 50–60 MPa, with a heat deflection temperature of about 55°C (131°F). However, while it’s easy to use and precise, it can become brittle under stress.
PETG is known for its durability and versatility. With a tensile strength of 40–50 MPa and a heat deflection temperature of around 70°C (158°F), it’s a solid option for functional parts. It’s also recyclable and often FDA-approved for food contact, making it a go-to for items that need to be both tough and safe to handle.
ABS stands out for its toughness and impact resistance. It has a heat deflection temperature of about 98°C (208°F) and a tensile strength of 34–36 MPa. However, ABS is more challenging to print - it’s prone to warping and requires an enclosed print environment with good ventilation to manage the fumes.
| Material | Tensile Strength | Heat Resistance | Ease of Printing | Best For |
|---|---|---|---|---|
| PLA | 50–60 MPa | 131°F (55°C) | Excellent | Decorative items, prototypes |
| PETG | 40–50 MPa | 158°F (70°C) | Good | Functional parts, containers |
| ABS | 34–36 MPa | 208°F (98°C) | Challenging | High-heat applications, durable parts |
Choosing the right filament is just one piece of the puzzle. How you store and handle your materials also affects the quality of your prints.
Safe Storage and Handling
Filament storage plays a critical role in maintaining print quality. Exposure to moisture can ruin a filament’s surface finish, weaken layer adhesion, and even clog your extruder. To prevent these issues, keep your filaments in airtight containers with desiccant pouches, such as silica gel or vacuum-sealed bags. Store them in a cool, dry place - consistent room temperatures between 65–75°F (18–24°C) work best.
For home printing, PLA and PETG are often better choices than ABS since they emit fewer fumes and are easier to work with. No matter which filament you use, ensure proper ventilation in your workspace. A desk fan can help direct fumes away, but if you print regularly, investing in a dedicated ventilation system is a smart move.
If you’re working with SLA printers, remember that uncured resin can irritate your skin and lungs. Always wear nitrile gloves and use a particle filter mask when handling it.
Avoid storing filaments in areas with fluctuating temperatures, like garages or attics. Stable conditions are key to keeping your materials in top shape.
Best Materials for Different Projects
Now that you know the basics of filament properties and care, let’s talk about which materials work best for specific projects.
For gaming accessories and fidget toys, PETG is a fantastic option. Its impact resistance and smooth finish make it ideal for items that need to endure frequent handling. On the other hand, PLA is a top pick for decorative items or prototypes. Its ease of use and dimensional accuracy make it perfect for projects where appearance and precision matter. Plus, specialty PLA variants - like wood-filled, glow-in-the-dark, or metallic options - open up endless creative possibilities.
For practical household items like phone stands, cable organizers, or tool holders, both PETG and ABS are solid choices. PETG’s FDA approval makes it especially useful for food-related items, such as cookie cutters or spice jar labels. If you’re tackling outdoor projects - like garden tool holders, signage, or automotive accessories - ABS is the better option due to its higher heat tolerance and durability. Just keep in mind that ABS requires a more advanced setup to print successfully.
In terms of cost, PLA is usually the most budget-friendly option, as it’s made from widely available raw materials. PETG is slightly pricier because of its added durability. Specialty filaments, like those infused with carbon fiber, come at a premium, but the added performance can be worth the investment.
Lastly, don’t underestimate the importance of print settings. Factors like layer height, infill density, and shell thickness can greatly influence the strength and performance of your final product. A well-designed PLA part can sometimes outperform a poorly executed PETG print. So, think of material choice as just one piece of the puzzle - good design and optimized printer settings are just as crucial.
Fixing Common 3D Printing Problems
Most Common Print Failures
When it comes to 3D printing, a few common issues can derail your project if not addressed properly:
- First layer adhesion problems: If the nozzle is too far from the bed, the bed temperature is too low, or the build surface isn't clean, the first layer won't stick properly. This can lead to shifting, warping, or even complete failure of the print.
- Warping: This happens when the corners of your print lift off the bed, often due to uneven cooling. ABS filament is particularly prone to this because it shrinks as it cools, creating stress that pulls the corners upward.
- Stringing: Thin plastic threads between different parts of your print indicate stringing. This occurs when the nozzle oozes filament while moving between areas, often caused by poor retraction settings or excessive temperatures.
- Under-extrusion: Weak, thin layers with visible gaps are signs of under-extrusion. This happens when your printer doesn’t push enough filament through the nozzle, which could result from a clogged nozzle, incorrect flow rate settings, or filament feeding problems.
- Layer shifting: If your print looks like it’s been sliced and shifted sideways, that's layer shifting. It’s a mechanical issue caused by things like loose belts, overheating stepper motors, or printing speeds that are too high.
Luckily, there are straightforward fixes to tackle these problems.
Step-by-Step Fixes and Maintenance
First layer adhesion: Start by leveling your bed using the paper test - a piece of paper should slide under the nozzle with slight resistance. Clean the build surface with isopropyl alcohol and, if needed, raise the bed temperature by 3–6°C. For glass beds, you can apply a thin layer of hairspray or glue stick to improve adhesion.
Warping: To combat warping, control temperature differences. Use a heated bed - set it to about 60°C for PLA and 80–90°C for ABS. Adding a brim or raft can increase the print's surface contact with the bed. If you're using ABS, consider using an enclosure to keep the ambient temperature consistent.
Stringing: Adjust your retraction settings to stop stringing. For Bowden tube setups, set retraction distance to 4–6mm; for direct drive extruders, use 1–3mm. Increase retraction speed to 40–60mm/s and lower the printing temperature by 3–6°C. Boosting travel speed can also help minimize oozing.
Under-extrusion: Check your nozzle by heating it up and manually extruding filament - it should flow smoothly. If not, perform a cold pull to clear it. Inspect your extruder gear to ensure it’s gripping the filament properly. If needed, increase the flow rate in your slicer settings by 5–10%.
Layer shifting: Tighten printer belts until they’re firm but not overly tight. Check that stepper motors aren’t overheating - add cooling fans if they feel too hot. Reduce print speed, especially for infill and travel moves, and make sure your printer is on a stable, level surface away from vibrations.
How to Prevent Failed Prints
Prevention is key. Regular maintenance and careful calibration can save you from many headaches.
- Maintenance routines: Keep your build surface clean by wiping it with isopropyl alcohol before every print. Store filaments in airtight containers with desiccant to keep them dry. Check belt tension weekly - they should have slight give but not feel loose. Lubricate linear rods and lead screws monthly using light machine oil or PTFE spray.
- Calibration routines: Re-level your bed every few prints, especially after moving the printer. Run a temperature tower test when switching filament brands to find the best printing temperature. Calibrate your extruder steps per millimeter (E-steps) to ensure accurate filament flow.
- Smart slicer settings: Use moderate speeds when starting out - 30–50mm/s for outer perimeters works well for most filaments. Enable supports for overhangs steeper than 45 degrees. Set your first layer height to 0.2–0.3mm and slow it down to 15–25mm/s for better adhesion.
- Environmental control: Keep the printing area at a stable temperature between 18–24°C. Avoid placing your printer near windows, heaters, or air conditioning vents, as temperature fluctuations can cause issues.
- Filament handling: Make sure your filament unwinds smoothly without tangling. Cut the end of the filament at a 45-degree angle before loading it into the extruder for easier feeding. Replace any filament that looks damaged, cracked, or inconsistent in diameter or color.
sbb-itb-c5cd7d3
Custom Products from 3rd Prints
Available Products and Custom Options
3rd Prints offers a wide range of customizable 3D-printed products, perfect for hobbyists, gamers, and anyone looking for unique gifts. Their collection includes items like keychain figures, tabletop gaming accessories, and fidget toys, all designed with creativity and functionality in mind.
Take the Skubbies Skeleton Keychain Figures, for instance. Priced at $24.99, these chibi-style collectibles make great accessories. Or consider the Flexi ArticuLotl for $19.99, which features an articulated design that’s perfect for keeping your hands busy.
For tabletop gamers, 3rd Prints provides specialized options like the Vampiric Resistance Dice Tower at $24.99. This piece isn’t just a dice tower - it also includes an integrated dice roller and even a 12oz can holder for added convenience during game nights. Another standout is the Cthulhu Dice Tower, also starting at $24.99, which brings functionality and a touch of mythical flair to your gaming sessions.
Animal-themed fidget toys add a fun and playful vibe to the lineup. The Amanda the Panda Keychain, priced at $16.99, features a flexible, multicolor design, while the Myrtle the Turtle Keychain, also $16.99, brings an ocean-inspired charm. For something larger, the Betsie the Bat Sea Star ($24.99) offers an articulated design, while the premium Crystal Dragon at $39.99 showcases a licensed Cinderwing3D model. This dragon not only makes for an eye-catching desk accessory but also highlights the craftsmanship that goes into 3rd Prints’ creations.
Small-Batch and Made-to-Order Benefits
What sets 3rd Prints apart is their made-to-order approach. This allows for a high level of customization, including color variations, size adjustments, and even minor design tweaks. Each product is crafted with care, ensuring every piece is unique. Plus, the team is always ready to assist with customization ideas or provide tips on how to care for your items. This hands-on process ensures that every customer enjoys a truly personalized experience.
Pricing and Product Details
The collection is priced between $16.99 and $39.99, offering options for different budgets and preferences. Whether you’re looking for an affordable animal keychain, a functional dice tower for game nights, or a premium collectible like the Crystal Dragon, there’s something for everyone.
When selecting a gift, think about the recipient’s interests. Keychains are a versatile choice, dice towers are ideal for gaming enthusiasts, and statement pieces like the Crystal Dragon make for impressive displays that showcase the artistry behind 3D printing.
Conclusion
Main Points to Remember
Success in 3D printing comes down to making smart choices at every step. Selecting the right printer should align with your goals and budget. If you're just starting out, look for beginner-friendly models that are easy to use and come with solid customer support. On the other hand, experienced users may lean toward advanced printers with features tailored for intricate and demanding projects.
The material you choose is equally important. For beginners, PLA is a safe and easy-to-use option. If you need something tougher for functional parts, ABS is a solid pick. PETG, with its chemical resistance and clarity, offers a versatile middle ground for specialized tasks. To keep your filaments in top condition, store them in airtight containers with desiccants to prevent moisture damage.
Troubleshooting is a critical skill for anyone in 3D printing. Many common issues, like poor bed adhesion, incorrect temperatures, or weak layer bonding, can be resolved with some patience and practice. Mastering these basics early on sets the stage for smoother projects down the line.
3D printing's versatility goes far beyond simple prototypes. Whether you're crafting custom gifts, gaming accessories, or practical household tools, this technology adapts to your creativity and needs.
Getting Started with 3D Printing
Embarking on your 3D printing journey doesn't have to break the bank or require extensive training. Start by defining your goals - whether you're envisioning gaming miniatures, home repairs, or artistic designs. This clarity will guide your choice of printer and materials.
Begin with straightforward projects, like calibration cubes or keychains, to familiarize yourself with the process. These simple prints teach valuable lessons about material properties, support structures, and design fundamentals. As you gain confidence, you'll be ready to tackle more complex, multi-part creations. Engaging with the 3D printing community can also provide tips, feedback, and inspiration to refine your skills.
Leverage pre-tested designs from online platforms to build experience. These reliable files let you focus on learning the mechanics of printing without unnecessary frustration. Over time, you can tweak these designs or even create your own from scratch.
The world of 3D printing is constantly evolving, with new materials and techniques emerging all the time. Stay curious and push your boundaries - what feels challenging today might become second nature tomorrow. With this mindset, you'll be ready to create everything from personalized hobby items to innovative gaming gear, inspiring others to explore the endless possibilities of 3D printing.
Ultimate Beginners Guide To Starting 3D Printing In 2025!
FAQs
What’s the difference between FDM and resin 3D printers, and how do I decide which one to use?
FDM (Fused Deposition Modeling) and resin 3D printers take different approaches to building objects, each catering to specific project needs. FDM printers work by heating and extruding thermoplastic filament through a nozzle, layering it to create the final shape. They’re perfect for functional parts, larger models, and cost-conscious printing. On the other hand, resin printers - such as SLA (Stereolithography) and DLP (Digital Light Processing) - use UV light to harden liquid resin, producing incredibly detailed and smooth results. This makes them ideal for intricate designs like miniatures or jewelry.
When deciding between the two, consider your project requirements. FDM printers are user-friendly and handle larger, less intricate models with ease. Resin printers, while offering unmatched precision, demand more post-processing and careful handling due to safety concerns. If you’re new to 3D printing or need durable, functional items, FDM is a solid choice. For smaller, highly detailed, or artistic creations, resin printing might be worth the added effort.
How can I fix common 3D printing issues like stringing and warping to get better print results?
To address stringing, tweak your printer's retraction settings. Try increasing the retraction distance slightly, perhaps by 1 mm, and reducing the retraction speed. These adjustments can help minimize unwanted filament oozing between different sections of your print. Additionally, check your nozzle temperature - if it's too high, it could be contributing to stringing.
For warping, focus on improving bed adhesion. Ensure your print bed is properly leveled and consider using aids like a glue stick, painter’s tape, or a heated bed. Materials such as ABS and PETG are especially prone to warping, so keeping the bed temperature steady and shielding the printer from drafts can make a big difference. Slowing down the print speed can also enhance adhesion and reduce the chances of warping.
By refining these settings and maintaining a stable printing environment, you can produce cleaner, more precise prints.
How should I store and handle 3D printing filaments to get the best print quality?
To get the best results from your 3D printer, taking care of your filaments is key. Always store them in airtight containers or vacuum-sealed bags with desiccants like silica gel. This prevents moisture from seeping in, which can lead to printing problems. Make sure to keep them in a cool, dry spot, away from heat, direct sunlight, and UV light to avoid any material degradation.
If you want to stay organized, consider placing your filaments on shelves or in sealed storage boxes. This not only keeps them in good condition but also helps extend their usability. By storing your filaments correctly, you'll avoid issues like stringing or poor adhesion and enjoy consistent, high-quality prints every time.