
How to Print Small Parts with Tight Tolerances
When 3D printing small parts, precision is everything. Even a tiny dimensional error can ruin fit, functionality, or appearance. To achieve tight tolerances, focus on four key areas:
- Printer Calibration: Ensure proper bed leveling, nozzle height, and extruder settings to avoid dimensional inaccuracies.
- Material Selection: Choose stable materials like PLA for FDM or high-precision resins for SLA.
- Design Adjustments: Add clearance gaps (e.g., 0.005 inches for tight fits), account for shrinkage, and optimize wall thickness.
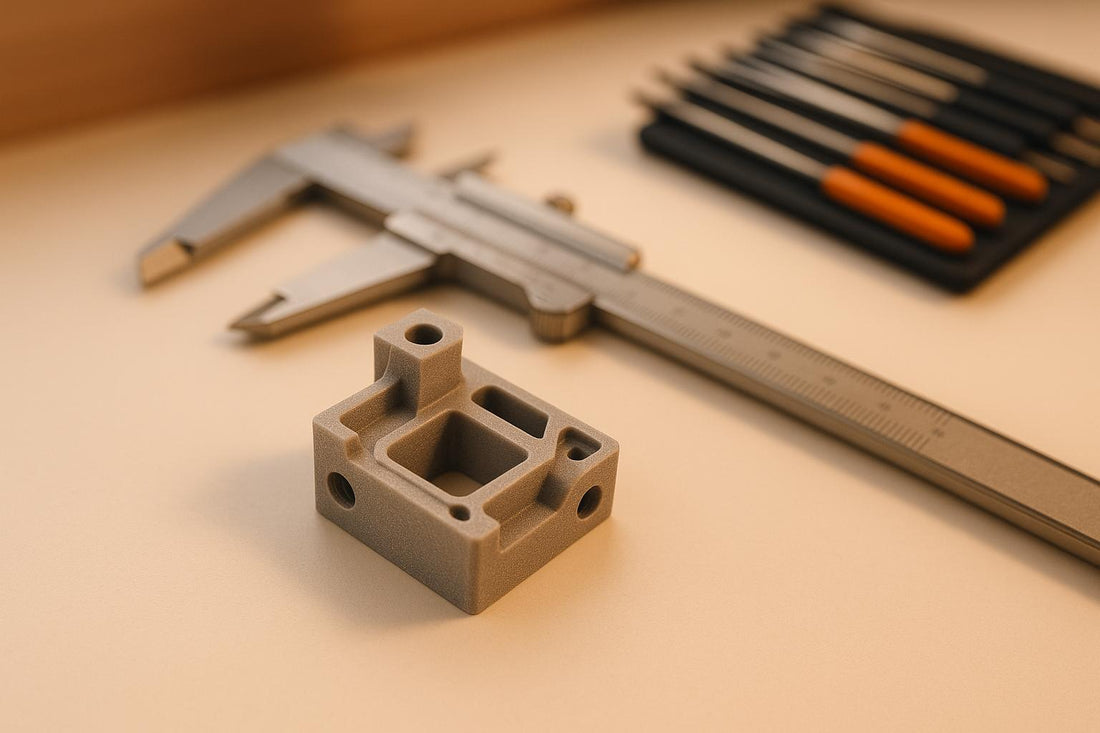
- Post-Processing: Refine dimensions with sanding, reaming, or surface treatments, and verify accuracy with tools like calipers or micrometers.
For extreme precision, technologies like Projection Micro Stereolithography (PµSL) can achieve tolerances as tight as ±0.0004 inches. Regular maintenance, consistent environmental conditions, and quality control ensure reliable results, whether you're printing prototypes or intricate gaming accessories.
What Are Tolerances and Why They Matter in 3D Printing
Defining Tolerances in 3D Printing
When we talk about tolerances in 3D printing, we're referring to the allowable deviation from a part's intended dimensions. These deviations are typically expressed as a plus-or-minus value (e.g., ±0.004 inches or ±0.1 mm). Essentially, tolerances define how much a finished part can differ from the original design while still being considered acceptable.
To measure tolerances, you compare the finished part against its CAD model using tools like digital calipers or micrometers. This process helps determine if the part meets the required specifications or falls outside the acceptable range.
Precision becomes especially critical when working on small-scale prints. Even the tiniest errors can affect how parts fit, function, or assemble. For instance, in applications like electronics housings, medical devices, or precision gaming accessories, a part that's even slightly off can be too loose, too tight, or completely unusable. This is why companies such as 3rd Prints, known for their intricate tabletop gaming accessories, prioritize tight dimensional control throughout their production process.
Now, let's dive into how different 3D printing methods handle tolerances.
Tolerance Ranges for Different 3D Printing Methods
Not all 3D printing technologies are created equal when it comes to precision. Each method has its own tolerance range, which makes selecting the right one for your project crucial. Here's a quick look at how they stack up:
| Technology | Tolerance | Ideal Use for Small Parts |
|---|---|---|
| FDM/FFF | ±0.020 inches (±0.5 mm) | Basic prototypes, less critical fits |
| SLS/MJF | ±0.012 inches (±0.3 mm) | Functional parts with moderate detail |
| SLA/DLP | ±0.008 inches (±0.2 mm) | High-detail miniatures, smooth surfaces |
| PolyJet/MJ | ±0.012 inches (±0.3 mm) | Multi-material prototypes, fine details |
| PµSL | ±0.0004–0.001 inches (±0.01–0.025 mm) | Microscale parts, medical devices |
For example, Fused Filament Fabrication (FFF), widely used for its affordability, offers tolerances around ±0.020 inches (±0.5 mm) or ±0.5%. While this level of precision works for basic prototypes, it might fall short for small, intricate parts that need a perfect fit.
On the other hand, Stereolithography (SLA) and Digital Light Processing (DLP) deliver much tighter tolerances, around ±0.008 inches (±0.2 mm). This makes them ideal for producing high-quality miniatures or small assemblies where both detail and surface finish matter.
For projects requiring extreme precision, Projection Micro Stereolithography (PµSL) is the go-to option. With tolerances as tight as ±0.0004 inches (±0.01 mm), it's perfect for applications like microfluidics and electronics, where even the slightest deviation can have significant consequences.
How Material Choice Affects Tolerances
The material you choose plays a massive role in determining dimensional accuracy. For instance, PLA filament is known for its stability and minimal warping, making it a popular choice for FDM printing when tight tolerances are a priority.
In contrast, ABS plastic can be trickier to work with. Its higher extrusion temperature and tendency to warp - especially around corners and overhangs - can lead to parts falling out of spec due to uneven cooling.
Materials used in SLA and DLP printing, such as resins, generally offer better dimensional control. High "green modulus" resins, which remain stiff before fully curing, allow for the creation of thin walls and intricate features with minimal deformation.
However, material behavior during curing or cooling becomes more critical at smaller scales. A shrinkage rate of just 1% might not be an issue for a larger part, but for a tiny component, it could result in a part that's unusable for its intended purpose.
How to Design a Print with Perfect Tolerance EVERY Time
Setting Up Your 3D Printer for High-Precision Printing
Getting your 3D printer dialed in for precision printing is all about the details. Small adjustments can make the difference between a flawless print and a failed attempt.
Key Printer Calibration Steps
The first step in achieving precise results is bed leveling. An uneven print bed can cause inconsistencies in the first layer, which will ripple through the rest of the print. When working on small parts where every fraction of an inch matters, this kind of error can throw off the entire result.
To manually level the bed, use a 0.004-inch gauge at each corner. Adjust until you feel slight resistance - it’s a tactile method that’s often more reliable than just eyeballing it. For those looking to streamline this process, automatic bed leveling tools like BLTouch can map your bed’s surface and adjust for minor irregularities automatically, ensuring a consistent first layer every time.
Next is nozzle height adjustment, which is just as critical. If the nozzle is too low, the filament gets squished, resulting in wider extrusion lines that can alter your dimensions. Too high, and you’ll face adhesion issues or warping. Aim for a height that allows the filament to flow evenly, creating smooth, consistent lines. To double-check, print single-layer calibration squares across the print bed. Properly extruded lines should have a slight sheen, without being overly flattened or showing gaps.
Extruder calibration is another vital step. Even a small error in extrusion can throw off tolerances, especially for intricate parts. To calibrate, measure and mark 100 mm of filament, then command the printer to extrude that exact amount. Compare what was actually extruded to the expected measurement. If there’s a mismatch, adjust the extruder’s steps-per-millimeter in your printer’s firmware.
Regular Maintenance for Consistent Precision
Once your printer is calibrated, regular upkeep is key to maintaining accuracy. For starters, belt tension plays a huge role in dimensional precision. Loose belts can cause backlash, leading to small errors in features like holes or thin walls. Check your belts monthly by plucking them - they should feel firm but not overly tight. Gradually tighten if needed, as over-tensioning can wear out motors and bearings.
Keep your nozzle clean to avoid inconsistent extrusion. Filament buildup can be removed with a cold pull using cleaning filament, especially before starting important prints.
Don’t forget lubrication. Linear bearings and lead screws need to be greased monthly if you’re a frequent printer. Use lithium grease for bearings and light machine oil for threaded rods, but don’t overdo it - excess lubricant can attract dust and debris.
Finally, inspect for loose screws and worn components. Pay particular attention to areas like the hotend mount, belt tensioners, and bed attachment points. Small parts printing often stresses your printer differently than larger prints, so regular checks can save you headaches later.
Controlling Environmental Factors
Your printer’s environment can significantly impact print quality. Stable conditions are crucial - temperature swings of even 10°F can alter material dimensions. Aim to keep your workspace between 68–77°F (20–25°C) for the best results.
Humidity control is also critical. Moisture in your filament can lead to uneven extrusion and poor surface finishes. Store your filament in airtight containers with desiccant packs, and maintain relative humidity below 50%.
To reduce vibrations, place your printer on a sturdy, stable surface away from foot traffic or machinery. Adding vibration-dampening pads can further minimize disruptions, preventing misaligned layers or wavy surfaces.
If you’re printing with materials prone to warping, like ABS, consider using an enclosure. It helps maintain a steady temperature around the print, reducing thermal stress that could compromise accuracy.
Companies like 3rd Prints, known for their high-quality gaming accessories and precision 3D-printed products, emphasize environmental control as part of their workflow. Their dedication to fine-tuning setups and maintaining optimal conditions ensures their products meet the tight tolerances their customers expect.
To monitor your setup, use a digital thermometer and hygrometer to track temperature and humidity. Keeping these factors in check is essential for achieving consistent, high-precision results in your 3D prints.
sbb-itb-c5cd7d3
Designing Small Parts for Tight Tolerances
Creating a flawless 3D print starts with a well-thought-out CAD design. Let’s dive into specific CAD techniques that help achieve tight tolerances.
CAD Modeling Tips for Precision
Clearance gaps are essential for ensuring parts fit together as intended. Depending on the type of fit you want, design your clearances as follows: 0.005 inches for tight fits, 0.010 inches for normal fits, and 0.020 inches for looser fits.
When it comes to holes, they often print smaller than designed due to STL file approximations and material behavior during printing. For example, a hole intended to be 3 mm wide should be modeled at 3.2 mm to account for this shrinkage. Similarly, pegs and pins should be designed slightly undersized in your CAD model to ensure they print to the correct dimensions.
Wall thickness plays a critical role in the success of your print. Each printing technology has its own minimum feature size that must be respected. SLA printers can handle walls as thin as 0.1 mm, while Multi Jet Fusion (MJF) typically requires a minimum of 0.5 mm, with 0.7 mm being a safer option. Ignoring these limits can result in warped or broken features that compromise your tolerances.
Adding fillets and ribs can also improve dimensional stability. Sharp corners and thin sections tend to concentrate stress, leading to deformation during printing or cooling. A small fillet radius of 0.5–1.0 mm can help stabilize these areas without sacrificing functionality.
Don’t forget to account for your material’s shrinkage characteristics. For example, MJF parts typically shrink by 2–3%, though many professional printing services automatically compensate for this. If your service doesn’t, be sure to scale your model accordingly to avoid size discrepancies.
| Technology | Minimum Feature Size | Typical Tolerance | Best For |
|---|---|---|---|
| SLA | 0.1 mm | ±0.1–0.2 mm | Fine details, smooth surfaces |
| MJF | 0.5–0.7 mm | ±0.3 mm | Functional parts, durability |
| FDM | 0.8 mm | ±0.5 mm | Prototypes, larger features |
Part Orientation and Support Placement
Once your model is ready, the next step is to fine-tune its orientation and support placement to improve accuracy.
A well-thought-out orientation strategy can significantly enhance dimensional precision. For example, aligning critical dimensions parallel to the build plate minimizes errors caused by layer lines and reduces overall cumulative inaccuracies.
When printing holes, orient them vertically to maintain consistent accuracy. Horizontal holes, on the other hand, can suffer from a stair-step effect due to the layer-by-layer construction process.
Surface finish is another factor influenced by orientation. Surfaces parallel to the build plate usually come out smoother, while vertical surfaces often show more pronounced layer lines. If a part requires a perfectly flat surface for mating with another component, orient that surface horizontally during printing.
Support placement is all about balance. Supports should be placed on non-critical surfaces to prevent warping while maintaining tolerances. The 45-degree rule is a good guideline for overhangs - angles steeper than this generally require supports. That said, small parts may sometimes handle steeper angles due to their reduced mass and shorter unsupported spans. Testing sample prints can help you determine the best support strategy for your specific design.
Advanced slicer software can make support management easier by allowing you to customize support density and contact points. This gives you more control over how supports impact surface quality and ease of removal.
For example, 3rd Prints uses these principles to produce gaming accessories like dice towers and keychains, which require precise fits for smooth operation. They achieve this by carefully planning part orientation and using minimal, strategically placed supports to protect functional surfaces.
Lastly, consider environmental factors during the design phase. Parts with large solid sections or varying wall thicknesses are more prone to warping due to thermal stress. To counter this, design with consistent wall thickness and incorporate relief cuts or hollow sections to reduce internal stress during cooling. These small adjustments can make a big difference in achieving accurate and reliable prints.
Post-Processing and Quality Control Methods
Post-processing is the key to refining printed parts so they meet precise tolerances.
Post-Processing Techniques for Final Tolerances
Sanding is a go-to method for smoothing surfaces and removing minor flaws. Start with a coarse grit and gradually work your way to finer grits to get the finish you want. Be careful with small parts - over-sanding can quickly throw dimensions out of tolerance. For flat areas and external surfaces, sanding works well, but always measure as you go to avoid removing too much material.
When it comes to holes, reaming is often necessary since printed holes tend to come out undersized. Use a reamer to bring them up to the correct diameter, applying just enough pressure to avoid over-enlarging or distorting the shape.
For an even finer finish, surface treatments can enhance both the look and the precision of your parts. For example, ABS parts respond well to vapor smoothing with acetone, which removes layer lines while keeping dimensions tight. SLA prints can benefit from resin coatings, which fill in tiny surface imperfections.
After every step, check critical dimensions to ensure you’re staying within tolerance. Precise measurement tools are essential for this phase.
Tools for Measuring and Checking Tolerances
Digital calipers are a must-have for quality control. They offer accuracy up to 0.0005 inches (0.01 mm), which is sufficient for most small parts. For even tighter tolerances, micrometers are the tool of choice, delivering precision down to 0.00005 inches (0.001 mm). Depending on the brand and level of precision, a good micrometer can cost anywhere from $30 to $200.
Gauge pins are excellent for quickly checking hole diameters across multiple parts. They offer a simple go/no-go test, making them ideal for batch production. Meanwhile, dial indicators are handy for assessing flatness, concentricity, and other geometric tolerances that calipers or micrometers might not capture. Businesses like 3rd Prints, known for precision gaming accessories and keychains, rely on these tools to ensure their products meet strict quality standards.
| Tool | Accuracy | Price Range | Best For |
|---|---|---|---|
| Digital Calipers | ±0.0005 in (0.01 mm) | $20–$100 | General measurements, small parts |
| Micrometers | ±0.00005 in (0.001 mm) | $30–$200 | High-precision thickness, small features |
| Gauge Pins | Varies by pin | $15–$50 per set | Quick hole diameter checks |
The combination of accurate tools and effective post-processing ensures your parts align with design specifications.
Testing Multiple Parts for Consistency
Even if one part meets your tolerance requirements, that doesn’t guarantee consistency across a batch. Testing multiple parts is essential to confirm your printer settings, post-processing methods, and quality controls are reliable over time.
For larger batches, statistical sampling is an efficient way to check consistency. Measure a representative sample - usually 10% of the batch or at least five parts - and compare critical dimensions to identify any patterns or outliers. For smaller batches, perform a first article inspection by thoroughly measuring and documenting the first part from each print run.
It’s also helpful to conduct process capability studies. By tracking key dimensions across multiple batches and calculating indices like Cp and Cpk (values above 1.33 indicate a capable process), you can spot trends and make adjustments as needed.
Keep detailed records of your measurements and process settings. These logs can help you catch gradual changes, like shrinking hole diameters over several batches, which could signal issues like nozzle wear or calibration drift.
Finally, maintain stable environmental conditions during production and post-processing. The goal isn’t to achieve perfection in every single part but to create repeatable results that consistently fall within your tolerance limits. Whether you’re making a single prototype or a batch of fifty, this approach ensures your parts perform as expected in their final application.
Conclusion: Getting Precision Right in Small-Scale 3D Printing
Achieving precision in small 3D printed parts boils down to four main areas: printer calibration, smart design choices, effective post-processing, and consistent quality control. Each of these steps builds upon the last, creating a workflow that delivers reliable and accurate results every time.
Regularly calibrating your printer is non-negotiable if you want consistent, repeatable prints. Pair that with thoughtful material selection - PLA, for example, offers better dimensional stability compared to ABS or nylon, making it a top choice when accuracy is key. Controlling your environment, such as maintaining stable temperature and humidity with an enclosure, helps prevent warping and keeps your prints on track.
When designing, account for proper clearance gaps - 0.005 inches for tight fits and 0.010 inches for standard fits. Adjust your CAD models to compensate for undersized printed holes, ensuring your parts fit together as planned.
The final touch comes with post-processing. Whether you're sanding surfaces, reaming holes to exact dimensions, or using digital calipers to verify measurements, these steps refine the precision established earlier. For businesses like 3rd Prints, this meticulous attention to detail is what sets their precision gaming accessories apart from average prints.
For hobbyists and collectors, precision goes beyond technical specs - it's about creating parts that function seamlessly and look polished. A dice tower with perfectly interlocking sections operates smoothly, while a keychain figure with sharp, clean details highlights the craftsmanship that makes 3D printing so enjoyable. When tolerances are tight, parts fit better, work as intended, and hold up over time.
Focusing on precision pays off, whether you're producing a single prototype or a batch of fifty parts. By following a streamlined process from start to finish, you can meet the high standards expected in precision gaming accessories and beyond.
FAQs
How do I keep my 3D printer accurate and reliable over time?
Keeping your 3D printer in top shape requires regular maintenance. Begin by checking for any loose parts and tightening them to avoid misalignment during printing. Make sure the print bed is leveled before starting each new project - this step is crucial for achieving consistent and accurate results. If you're switching to a different material, recalibrate your printer’s settings to accommodate the specific characteristics of the new material.
By staying on top of these routine tasks, you’ll not only improve the precision of your prints but also extend the lifespan of your printer. This means you can continue creating high-quality prints with intricate details and precise tolerances.
What are the best practices for designing small 3D-printed parts with tight tolerances in CAD software?
When creating small 3D-printed parts that require tight tolerances, precision is key. Start by setting your CAD software to high-resolution to capture intricate details effectively. Keep your designs straightforward - overly complex geometries can be tricky for printers to handle accurately, especially at a small scale.
Pay close attention to material shrinkage and the tolerances specific to your 3D printing method. For instance, FDM and SLA printing each come with their own quirks and limitations. To fine-tune your design, print prototypes and adjust as needed. Also, don't forget to factor in post-processing steps, like sanding or assembly, to ensure the final product meets your expectations for fit and finish.
How does the material choice affect the accuracy of small 3D-printed parts?
When it comes to achieving precision in small 3D-printed parts, the material you choose can make all the difference. Each material reacts uniquely during the printing and cooling process - some expand, others shrink, and these behaviors directly affect the final dimensions. Take ABS, for instance: it tends to shrink more than PLA, which makes it trickier to manage for tight tolerances unless you've fine-tuned your setup.
For better accuracy, opt for materials that are more stable, like PLA or resin, and adjust your printer's settings to suit the specific material you're working with. Don't overlook environmental factors such as temperature and humidity, as these can also impact material behavior during printing. A little testing and tweaking go a long way in ensuring your small parts meet the desired tolerances.