
How to Test 3D Print Surface Durability
Surface durability testing for 3D prints helps you understand how well your creations hold up against daily wear and tear. Whether you're making dice towers, keychains, or fidget toys, these tests identify weak spots, improve material choices, and refine print settings. Here's a quick summary:
- Why test? To prevent scratches, wear, coating failures, or layer adhesion issues that can ruin functionality or appearance.
- Common problems: Scratches, smooth wear patterns, peeling coatings, and weak layer bonds.
- How to test: Use scratch resistance, wear resistance, and coating adhesion tests.
- Preparation tips: Ensure consistent sample sizes, uniform print settings, and proper material storage.
- Improvement methods: Choose durable materials (like PETG or polycarbonate), adjust print settings (layer height, wall thickness), and use post-processing techniques (sanding, coatings, annealing).
Durability testing isn't complicated. Even basic scratch tests can reveal how materials and settings perform, helping you create stronger, longer-lasting prints.
Biodegradable and PLA filaments Durability Tests
Preparing Test Samples for Durability Testing
If you want dependable test results, start by preparing consistent test samples. Without proper preparation, your durability tests won't provide an accurate picture of how your dice towers, fidget toys, or keychains will hold up under real-world conditions. The steps below will help ensure your samples produce reliable data.
Tools and Materials You'll Need
Before you begin, gather the right tools for printing and post-processing. A digital caliper is essential to check the accuracy of your printed parts' dimensions and to verify filament consistency. This ensures your samples match the intended specifications.
For post-processing, have sandpaper (ranging from 220 to 1,000 grit) ready to smooth surfaces. You'll also need tools like deburring tools, knives, or a Dremel rotary tool to remove brims, supports, or rough edges that might affect test results.
Your 3D printer must maintain consistent settings, such as layer height, infill percentage, and surface orientation. If you're working with materials prone to warping, like ABS or polycarbonate, use an enclosure to stabilize the printing environment.
Proper material storage is equally important. Keep hygroscopic filaments like nylon in sealed, dry containers with desiccant packs to prevent moisture absorption. Moisture can lead to uneven surface textures, which could skew your durability tests.
Printing Consistent Test Samples
Reliability starts with uniformity. A standard test piece - such as a 2″ x 1″ x 0.25″ rectangle - is ideal. It's large enough for testing but small enough to print quickly and economically.
Set your layer height to 0.2 mm for a balance of speed and surface quality. Use a consistent infill percentage - 20% works well for most durability tests. While higher infill can improve strength, it's best to test with the settings you'll use in your final product.
Pay close attention to surface orientation when printing. The way your sample is positioned affects wear patterns and scratch resistance. Print some samples with the test surface facing up (fewer visible layer lines) and others perpendicular to the build plate (more layer lines exposed). This helps you evaluate how orientation impacts durability.
Keep your speed and temperature settings the same for all samples. Even minor changes can alter surface texture and skew results. Record all settings to replicate successful combinations later on.
Managing Test Variables
To get meaningful data, standardize all conditions except the one you're testing. For example, if you're comparing materials, use identical print settings for each sample. If you're testing different layer heights, stick to the same material and post-processing methods.
Consistency in post-processing is also key. If you sand one sample with 400-grit sandpaper, do the same for all samples in that group. The same rule applies to chemical treatments, primers, or coatings.
Environmental factors during printing can also influence results. Print all samples for a specific test within a short time frame, using filament from the same spool. Changes in temperature and humidity can affect how materials behave, even with identical settings.
Clearly label each sample with details like material type, print settings, and post-processing steps. This will prevent mix-ups and help you track which combinations perform best.
Finally, store your finished samples in a controlled environment before testing. Avoid exposing them to extreme temperatures or humidity, as these can alter material properties. Some plastics continue to cure or stabilize for days after printing, so aim to test samples 24 to 48 hours after they’re made for consistent results.
Surface Durability Testing Methods
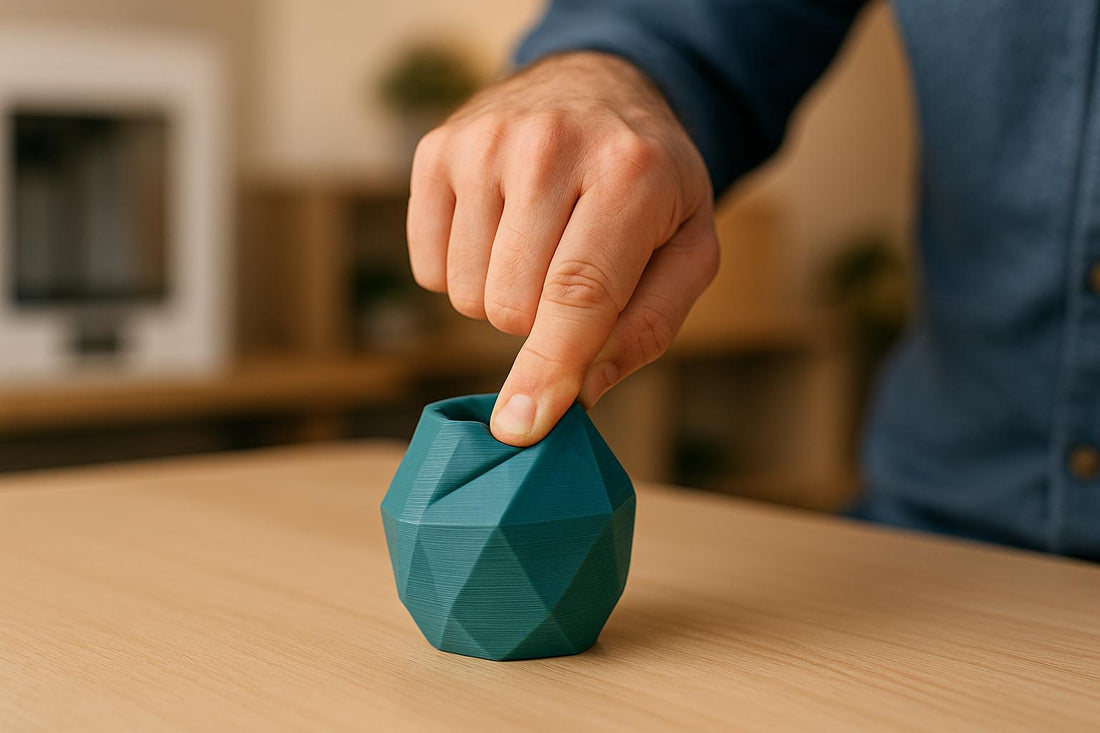
Once your samples are properly prepared, the next step is to assess how well they can handle wear and tear. One effective way to do this is through scratch resistance testing, which helps determine how 3D-printed surfaces hold up against everyday abrasion.
Scratch Resistance Testing
Scratch resistance testing measures how durable a surface is when exposed to abrasion.
Start by ensuring your sample is clean and free from any surface contaminants. The sample you test should accurately represent the material or coating you're evaluating. For the test itself, you'll need a scratch tester equipped with an indenter that matches your testing method and material type.
During the test, apply either a constant or gradually increasing force with the scratch tester. Maintain a uniform speed until you observe the first signs of failure, such as cracks or chips in the coating. Afterward, use high-resolution imaging to document the damage. Record critical data like the load and scratch length at the point of failure. Analyzing the damage patterns can provide valuable insights into how the material behaves under stress.
sbb-itb-c5cd7d3
Reading and Comparing Test Results
Carefully analyzing your durability test data is key to understanding the performance of your 3D prints. By documenting and comparing results, you can fine-tune your material choices and print settings for better outcomes in future projects.
Recording Test Data
Accurate data collection starts with the same precise tools you used during sample preparation. Use digital calipers to measure scratch depths and wear patterns. Take consistent-angle photographs to visually capture failure modes, and, if relevant, note ambient conditions like temperature or humidity. These detailed records are essential for organizing and comparing your results effectively.
Creating Comparison Tables
A well-structured table can make it easier to identify trends and differences between materials and print settings. Include key data points such as material type, layer height, infill percentage, scratch load, wear depth, and a visual damage rating. Here's an example format:
| Material | Layer Height | Infill % | Scratch Load | Wear Depth | Visual Rating |
|---|---|---|---|---|---|
| Example A | 0.2 mm | 20% | [value] | [value] | [value] |
| Example B | 0.2 mm | 20% | [value] | [value] | [value] |
| Example C | 0.15 mm | 30% | [value] | [value] | [value] |
By grouping test results based on material and settings, you can uncover patterns - for example, how varying layer heights influence scratch resistance. This organized approach helps predict how different designs will stand up to wear and tear.
Applying Results to Daily Use
Your test results aren't just numbers - they're tools to predict how your 3D prints will perform in daily life. For frequently handled items like dice towers or gaming accessories, prioritize materials and settings that resist scratches and wear. Products like keychains or fidget toys, which endure constant friction, may need extra durability or protective coatings. Additionally, check how well coatings adhere to ensure finishes maintain their appearance over time. Use these insights to make smarter material and setting choices for your projects.
Tips for Better Surface Durability
Improving the durability of 3D prints often comes down to smart material choices, fine-tuning your print settings, and using the right post-processing techniques. These steps not only improve test results but also ensure your prints hold up under everyday use.
Choosing Durable Materials
The material you choose plays a huge role in how well your prints resist wear and tear. For example, PLA is prone to scratching and isn’t ideal for high-use items. On the other hand, PETG offers better impact resistance and chemical stability, making it a solid choice for functional items like tool holders or gaming accessories.
For even more strength, polycarbonate (PC) stands out. It can handle temperatures up to 280°F and resists scratches better than most other materials. However, PC requires higher printing temperatures (around 500–570°F) and an enclosed printer to avoid warping.
ABS offers decent durability with better impact resistance than PLA, but it can warp during printing. If your project involves outdoor use or UV exposure, ASA (Acrylonitrile Styrene Acrylate) is a great alternative. It provides similar strength to ABS but holds up better against sunlight and weather.
If you need flexibility and wear resistance, nylon is a top contender. It’s perfect for mechanical parts or items that need to bend without breaking. Just keep in mind that nylon absorbs moisture, so proper storage and drying are essential.
Material choice is just the start. Once you’ve selected the right one, fine-tuning your print settings can take durability to the next level.
Print Settings for Durability
Your print settings have a direct impact on how strong and wear-resistant your 3D prints are. For starters, using thinner layers - around 0.1–0.15 mm - results in smoother and stronger surfaces, though it does increase print time.
Wall thickness is another key factor. Boosting wall thickness from the standard 0.8 mm to around 1.2–1.6 mm can make a big difference for items that are frequently handled, providing a tougher outer shell that resists scratches and impacts.
While infill percentage doesn’t matter as much for surface durability, a moderate infill of 20–30% offers good structural support without wasting material. The infill pattern, however, is more important. Patterns like gyroid or cubic distribute stress more evenly than simpler linear designs.
Higher print temperatures are also crucial for better layer adhesion. For instance, printing PETG at 465–480°F instead of the minimum 430°F can significantly improve the bond between layers.
Lastly, slowing down your print speed to about 30–40 mm/s helps with layer bonding and reduces internal stresses that could lead to surface cracking over time.
Once your settings are dialed in, post-processing techniques can further enhance durability.
Post-Processing for Durability
Post-processing is where you can refine and strengthen your prints. Sanding is a simple but effective method. Start with 220-grit sandpaper and gradually move to finer grits like 400 and 800. This smooths out layer lines, which are often weak points where cracks can form.
For ABS prints, vapor smoothing with acetone is a game-changer. The acetone slightly melts the surface, erasing layer lines and giving the print a glossy, scratch-resistant finish. Just remember to work in a well-ventilated area and use proper safety gear.
Protective coatings are another way to boost durability. Clear polyurethane, available in matte or gloss finishes, adds excellent scratch resistance. Apply thin, even coats, sanding lightly between layers for the best results. If you need a rock-hard surface, epoxy resin is a great option, though it does add some thickness and weight.
Annealing is particularly useful for PLA prints. By heating the part in an oven at 140–160°F for 15–30 minutes and allowing it to cool slowly, you can relieve internal stresses and increase strength. Be aware, though, that slight shrinkage may occur during this process.
For decorative items like dice towers or miniature bases, primer and paint designed for plastics can add both durability and style. Automotive primers work well for adhesion, and when combined with acrylic paints and a clear topcoat, they create a tough, customizable finish.
Finally, chemical welding can strengthen layer bonds in ABS prints. Applying a small amount of acetone to the surface and smoothing it with a cloth helps the layers fuse together as the solvent evaporates, leaving a more unified and durable part.
Summary and Key Points
Testing the durability of 3D print surfaces is a smart way to ensure your creations stand the test of time. Whether you're crafting functional tools or decorative pieces, knowing how your prints hold up under real-world conditions helps you make better choices about materials and designs right from the start.
Testing Methods Overview
This guide highlights three key durability testing methods, each tailored to specific needs:
- Scratch resistance testing: Using standardized tools, this method shows how well surfaces can withstand everyday handling and potential damage.
- Wear resistance testing: Simulates long-term use by exposing surfaces to repeated rubbing or abrasion, mimicking real-world wear and tear.
- Surface coating adhesion testing: Essential when working with primers, paints, or protective coatings, this test ensures coatings stay intact over time.
For accurate results, it’s crucial to use consistent test samples and control variables throughout the process. Running multiple tests and averaging the outcomes provides a clearer picture than relying on a single data point. These methods are invaluable for improving designs, whether for personal projects or functional applications.
Practical Applications for Hobbyists and Gamers
These testing techniques aren’t just for professionals - they’re incredibly useful for hobbyists and gamers, too. For example, tabletop gaming fans can ensure their dice towers or miniature bases remain pristine after months of use. Hobbyists designing tool organizers can avoid the frustration of reprinting due to wear-related failures. Custom gaming accessories, like controller grips, benefit greatly from durability testing since they endure constant handling.
At 3rd Prints, durability testing plays a key role in creating reliable products like fidget toys, keychains, and gaming accessories. This focus on durability ensures customers receive items that last for years, not just months.
How to Start Testing Your Prints
Getting started with durability testing doesn’t have to be complicated or expensive. Begin with simple scratch tests using everyday items like coins, keys, or even your fingernails. These basic tests can provide valuable insights into how different materials and print settings perform.
Keep detailed records of your materials, settings, and test results. This will help you identify the best combinations for your needs. You might also consider creating a standard test piece to print with different materials or settings. Having a consistent sample makes it easier to compare results and track improvements over time.
The key is to just dive in. Even simple tests can reveal patterns that improve your overall print quality. Before long, you'll discover the ideal materials and settings for your projects, leading to more durable and dependable 3D-printed creations.
FAQs
What’s the difference between scratch resistance, wear resistance, and coating adhesion tests for 3D-printed surfaces?
Scratch resistance tests are designed to evaluate how well a 3D-printed surface can handle scratches or gouges. These tests typically involve applying either a constant or gradually increasing force to see how much damage the surface can endure.
Wear resistance tests, on the other hand, focus on how a surface performs under prolonged mechanical wear, like sliding or abrasion. This simulates the kind of wear and tear a material might face during extended use.
Meanwhile, coating adhesion tests examine how firmly a coating sticks to the surface. This is crucial for ensuring durability and protection. Common methods for these tests include cross-cut and pull-off techniques.
Each of these tests targets a different aspect of durability: scratch tests assess resistance to surface damage, wear tests look at long-term mechanical performance, and adhesion tests check how well coatings remain attached.
How can I choose the right material and settings to make my 3D prints more durable?
To make 3D prints that stand the test of time, start by choosing durable materials like polycarbonate, nylon, or ABS. These materials are known for their toughness and ability to withstand impact, making them ideal for projects that demand strength and long-term use.
Next, focus on adjusting your print settings to boost durability. Increase the wall thickness and infill density, and ensure layers adhere properly during printing. These tweaks help reinforce the structure and improve resistance to wear and tear. Be sure to tailor these settings based on the material and the specific requirements of your project.
When you pair the right material with carefully optimized print settings, you’ll create 3D prints that can handle even the most challenging tasks.
What are the best ways to improve the durability of 3D-printed surfaces?
To make your 3D-printed surfaces tougher and longer-lasting, try post-processing techniques such as sanding, vapor smoothing, or applying protective coatings. Sanding helps eliminate layer lines and imperfections, leaving a smoother, more polished surface. Vapor smoothing works particularly well with materials like ABS, as it slightly melts the surface, increasing scratch resistance while improving the overall finish. Adding resins, sealants, or other coatings can fill in surface pores, providing extra strength and better protection against wear. These techniques not only make your prints more durable but also give them a polished and professional appearance.